Icon
Descriptions:
Add
– Add a selected photo to your page.
Box
– Add an empty photo box to your page that can be filled with a photo later.
Border
– Add a border around the selected photo.
Shadow
– Add a shadow to the selected photo.
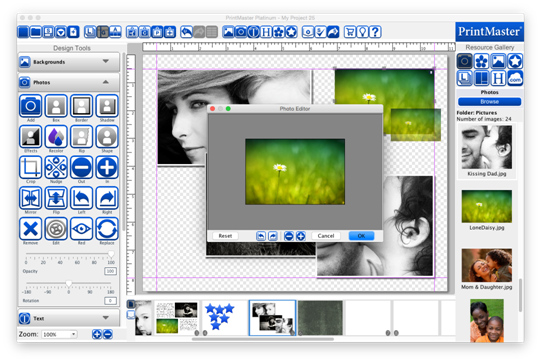
Effects
– Apply effects such as black and white, sepia, etc. to the selected photo.
Recolor
– Recolor the selected image.
Rip
– Rip the edge (s) of a selected photo.
Shape
– Convert the selected image from a box to a shape.
Crop
– Crop unwanted portions of an image out of the selected photo.
Nudge
– Slightly move the displayed area of a zoomed or cropped image.
Out
– Zoom out the displayed on the selected photo.
In
– Zoom in on the displayed area of the selected photo.
Mirror
– Flip the image horizontally on the page.
Flip
– Flip the image vertically on the page.
Left
– Rotate the image left 90 degrees.
Right
– Rotate the image right 90 degrees.
Remove
– Deletes the photo from the page.
Edit
– Displays photo info and allows you to adjust the photo size and position.
Red
– Remove red eye from a selected photo.
Replace
– Swap the selected image with a different photo.
Opacity
– Drag the slider left or right to increase or reduce the photos transparency.
Rotation
– Drag the slider left or right to apply a rotation.
Photo Recommendations:
Format - JPG or PNG.
Resolution - Roughly 300DPI (dots per inch) or higher recommended for printing.
Ratio - 4x4 inches (1200x1200 pixels) or larger for printing. Background or full page images should be 12x12 (3600x3600) or larger.
File Size - Roughly 10MB or less in file size. Larger files sizes can have trouble rendering.
Color Mode - RGB, (red, green, blue).
Clip Art - Save as PNG, and add as custom Clip Art to preserve transparency.
There
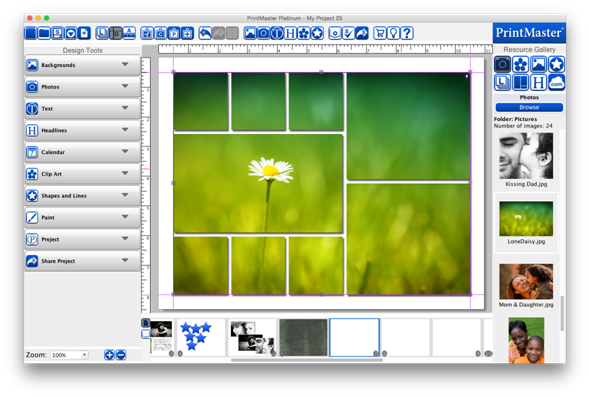
are multiple methods for adding a photo to a page:
Add
Icon.
1.
Select a page.
2.
Open the Photos tab.
3.
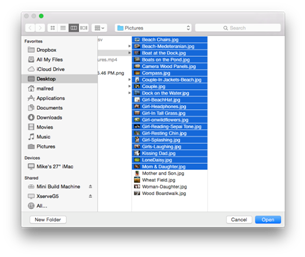
Click on the Add icon.
4.
Select an image from your computer and click Ok.
Gallery.
1.
Select a page.
2.
Select the Photo icon in the Resource Gallery.
3.
Double-click or drag and drop an image from the gallery list
onto your page.
Photo
Box.
1.
Add or use an existing photo box on the page.
2.
Double-click on the empty box.
3.
Select an image from your computer and click Ok.
Drag
and Drop. – You can drop images onto your page from a folder on your computer.
Cop
and Paste – You may copy and paste image files onto your page as well.
Fast
Fill – Add multiple images from a folder to empty photo boxes in the project.
1.
Go to the Insert menu > Fast Fill.
2.
Hold Shift on your keyboard to select multiple images from a
folder then click Ok.
The Organize Photos window allows
you to add more photos, remove, rearrange, or rotate.

·
Click on the Add Photos button to add more photos.
·
Photos will be placed on pages in the order that they appear
in the preview pane.
·
To rearrange photos drag and drop the photo to a new
position.
·
If a photo is sideways select the image then click Rotate 90°.
·
Sort the photos by the name or chronologically, by selecting
Name or Date.
·
Click Finish to add all images to empty boxes in the
project.
·
Check each page after it has completed, some adjustments may
be needed.
Photo Tiling – Allows you to fill multiple photo boxes with a single image.
1.
Open the Photos tab under Design Tools.
2.
Click on the Add Photo Box icon to place an empty box on
your page.
3.
Repeat this process, size, and position multiple boxes
throughout the page.
4.
While holding the shift key, select multiple boxes with a
left-click.
5.
Once all the boxes are selected go to the Arrange menu >
Group.
6.
Open the photos tab in the Resource Gallery.
7.
Drag and drop an image from the gallery onto the grouped
boxes
8.
The image will fill the space of the grouped boxes leaving
space between boxes.
Borders - You may add a border or frame around a photo.
· Select a photo and click on the border icon to display the border dialog.
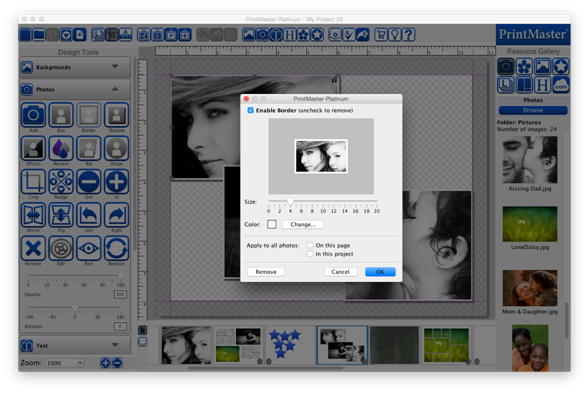
·
Drag the Size slider to change the size of the border. (pixels)
·
Click Change to choose a color for the border.
·
Toggle the check boxes to apply the border settings to all
photos on the page or project.
·
Click OK to apply.
Related Topics
Using PrintMaster
Shadows – Add a shadow to a photo to give it depth and make it stand out on the page.
Nudge
Remove Red Eye
Photo Effects – Allow you to apply different effects to a selected photo.
Photo Edit